Wednesday 30 November 2011

Sewing Update


I've been spending the last little while working on finalizing all of the fabrics and designs for Subtle Memory. I have to order some of them online (if the designers will put up with my requests that is) so I'd like to get that done as soon as I can so that they're here when I need them, and I can deal with any issues that might arise before it's too late.

I also need to get some buttons and a few more zippers, but I think they can wait for a bit.


The first 'official fabric' prototype is well on its way to being finished (some MNF shorts :) ), but realizing how difficult it's been to find time to work on them what with work and Christmas, applying for exchanges and rushing off to visit my Grandmother, coupled with the sheer size of this insane undertaking... I've decided that I'm going to need a little bit of help.

And I think it's going to have to be in the form of my arch-nemesis:


Singer Sewing Machine
Image stolen from the internets. 
I'm pretty sure it's not the one I have... but I don't actually know what mine looks like so I can't be sure.


Yes... I'd wanted to keep this sewing-machine-free... but I think I'm going to have to enlist its help if I'm hoping to get everything finished by April. Especially if next term turns out to be as busy as the last couple of weeks have been!

There's going to be a steep learning curve - even though I've (sort-of) used sewing machines before - since everything is so tiny... not to mention I have an intense disliking for sewing machines. Luckily, this one is brand new, and I don't harbour too much distaste for it specifically... well... not yet anyway.
Most things will likely still be done by hand, like anything Bisou Ai size or smaller and basically anything else I can get away with... but the more repetitive seams I'm going to attempt on the machine. If it doesn't try to kill me... I think I'll consider it a success, and if I get some usable items, hey, all the better.


Thursday 17 November 2011

Fun with knots v2.0


Alrighty. Now that I've satisfactorily ruined the wig with some stray scissor snips, I thought it was time to post up the second part of the wig tutorial. Though I'm still not too sure that's what it is.

---

Materials:
  • curly fibre wig *this won't work with heat-resistant wigs
  • water
  • kettle
  • sink or something you can pour boiling water into without issue
  • plastic cutting board (the flat one that are easy to roll up) *you only need this if you're using a sink, it's just to block the hair from falling down the drain
  • little plastic doll brush (à la Barbie or MLP)
  • towel
  • wooden ball the same size as your dolls head *important
  • wig stand or something that can hold the wig while it's drying
Optional:
  • rubber gloves
---

This is actually a lot easier than it might seem.

First, gather your supplies. Here's my wig from the last post after I had brushed out all the curls:

Damaged Soom Glot wig


Fill up your kettle and set it to boil. While it's bubbling away, put the wooden ball into the wig. I forgot this while I was working on mine that's why it's not in the photos, but it's very important. Do not skip this step!

Half-straightened Soom Glot wig
You can see where the kink was starting to form.

Now, for the first bit, I put the wig on top of a metal bottle. This worked until it was pointed out to me that the bottle was really big and would leave a kink in the hair, so I switched to a glass one with a more tapered top - as you'll see later. You just need something that you can rest your little wooden head on and is long enough for the wig. You could be fancy and use an actual wig stand... but a bottle will work for now.

---

If you're using a sink, put the cutting board on the bottom of the sink covering up the drain (don't put anything else in the drain though, you still want the water to go down it).

When the kettle is boiled, wait a minute or two before you start pouring. This will cool it down enough to not fuse the fibres, but it will still be hot enough to do what we need.

If you want to wear gloves, now's the time to put them on. Personally, I didn't, but that's just because I love burning my fingertips with scalding hot water... and couldn't be bothered to go find them.

---

The water should be cool enough now, so grab your trusty little brush and the kettle and head on over to your sink. Work slowly, one section at a time. I tried to work in about 2cm patches for the first while. Put one finger on the crown/part of the wig to hold it down and keep it from flying off your bottle. Pour some water over the top of the head, not right by the crown, but a centimetre or so below it. If your wig has bangs, avoid these for now.
Just pour enough the get it wet and then brush through. You can skip the brushing step if you want wavy hair... that seems to be what happens otherwise, but if you want pin straight hair, you'll need to brush it.

Continue doing this until you reach the other side of the wig and then start again.

Once you're mostly satisfied, take the wig off the bottle and put it (with the bangs facing up) in the sink. We're going to try and get the wavy bits at the base of the wig now. Do the same thing as you were when the wig was on the bottle, pour and brush, pour and brush, just try to avoid pouring too much water on the elastic. They don't enjoy that much.

Straightened Soom Glot Wig
Voilà! Nice and straight. :)


Finally, once you're satisfied, put it back on the bottle and pour some water right over the crown (including bangs) and brush out everything one last time. This is only for wigs with a circular crown. For ones with parts, you'll have to do this twice instead. Once on one side, and again on the other. I'm not going to get into side bangs for now. Sorry.

Leave it on the bottle to dry over night and tomorrow you can get on to styling! Yay!
(Just be careful and think before you cut or you'll end up with a lovely mess just like me)

Monday 14 November 2011

...and The Teeny Tiny TARDIS


Now that it's reached its new home, I can post photos of the secret present I made to accompany the puki!Dr. Who commission from a while back.

I wanted to send her a gift for being such a fantastic person, but I didn't know what to make until I was watching an episode of the show and realized... you can't have a tiny-time-travelling Doctor without his tiny-time-travelling Police Box!

And so the Teeny Tiny TARDIS was created. It was a lot easier than the little clothes since the stitches could be a little bigger and a little messier, so I could work on it when it was too dark for the clothing.

Doctor Who: Tiny felt TARDIS

Doctor Who: Tiny felt TARDIS

This was only my second time ever doing embroidered letters (that I can remember anyway), so they're a little wonky, but I think they came out alright overall.
While making this, I realized that I truly adore making plushies, lettering not so much, but I love making plushies.... I think I'll have to make a few up in between working on presents and collection pieces. Not sure what I'll do with them after, but at least I'll have made them.

Also... I kind of want a little TARDIS for myself now....


Sunday 13 November 2011

Christmas Gifts


This year, I've decided to make felt hair accessories for my little cousins. I like working with felt since it's very forgiving, but still looks nice (and it's also super cheap!). I have lots of felt and embroidery floss already from random phases I've had, so I probably won't need to buy all that much, but I will need to find bases for them. Hopefully I can still get them at Michael's, otherwise I'll probably need to go to the dollar store or something and see if there's anything I can deconstruct.

---

I'll be working on this alongside my spring collection, but considering the fast-approaching deadline (that I definitely did not forget about... >.> <.< >.>), the gifts will probably be taking centre stage until they're done.

Saturday 12 November 2011

Consistant Vision


I haven't had all the much time recently to work on the collection. Not to mention, I've been banned from sewing until Monday so I can... you know... have one of those fancy life things....

BUT!

Luckily, taking photos of sewing materials isn't sewing, so I can finally make this post!

I saw a mood board on a friend's blog (zis one) and it got me thinking. I always make mood/inspiration 'boards' in my head, but I've never actually made a real life one before, so, since this is a brand new endeavour, why not start now?

I don't have all the supplies I need for this collection, but I've got it nailed down enough that I think, for me anyway, it doesn't need to have everything in it. So, I just grabbed everything I had and tossed it together to make this:

Subtle Memory - Inspiration Board

As you can probably tell... the three MUTED colour idea has sort of gone out the window and I've added navy blue and chocolate brown. I plan to keep them to a minimum, but I just couldn't get it to work in my head without a few dark colours in there.

---

I think having everything laid out like this is a good way to keep yourself on track. If you want to add something and it just really isn't fitting with what you already have... then it probably doesn't need to be there. Sometimes, it's good to have less things with more 'flow' than to try and cram every single thing you want to do into one project.

---

For most people, I think something like this would be enough to keep them on track. For me, however, I know my brain likes to fly all over the place and I get very easily distracted thinking about other ideas, so I need a bit more to keep me focussed.

That's why I have a nice little organized folder on my computer of inspiration photos. But I think I'll keep those secret for now. A more complete and useful board would include them... but Photoshop keeps crashing... and I really don't want to deal with it right now.

In addition to the fashion and colour inspirations I keep, I also have a list of some more intangible things, namely music. Now, this collection was supposed to have a more calm and pleasant atmosphere to it, but every time I hear If I Die Young by The Band Perry, I can't help but be reminded of it. Every time it comes on, I want to work on something related to this collection. The song has a more melancholy feel than I'd wanted, but it just seems to become more and more relavant with each passing day.

---

Do you keep an inspiration board when you're working on a project? Why/Why not? Do you think it's a good idea even if you don't make them yourself?

Wednesday 9 November 2011

Google+ Page


I've started a page on Google+ for inEssence.

You can find it here.

I'm not sure how much I like it as of yet, but I'll probably post some collection-related updates there at least for a while.

Sunday 6 November 2011

Fun with Knots


Alternate title: Restoring a damaged wig.


A few weeks ago, I bought a damaged Glot wig from someone on DoA. It was pretty tangled and sort of looked like a ball of fuzz caught in a fishing net when I got it.

I was planning on cutting it decently short and using it for Tobi if it was really damaged, but after I combed it out, it just looked like it was really tangled, but actually not all that damaged - much to be expected from a ringlet wig. So I figured I might as well try and see if I could get it back to a decent state and if not, I could still cut it like I'd planned.

It was rather dark and I was kind of tired and I wasn't originally planning to write about this, so I don't have many pictures, but here's what I did:

---

Materials:
  • damaged (curly) fibre wig
  • water
  • shampoo
  • conditioner
  • little plastic doll brush (à la Barbie or MLP)
  • towel
  • paper towel ripped into strips about 1 inch wide and as long as the wig
  • wig stand or something that can hold the wig while it's drying
---

The first step was simply soaking in in lukewarm water and brushing it out the best I could with a little doll brush.

Do not use a people brush or comb.

They will pull on the fibres and can make an even worse mess than what you started with.

Make sure to flip it over and brush from the inside too. It might not seem like it, but it will make your job a lot easier later.

---

It doesn't matter if the curls get separated or if it goes all frizzy, just make sure you're not pulling the fibres so that they break in the middle. This will make them curl up and you will have to cut them out. If you're having trouble getting the tangles out, start from the bottom and work your way up, just like you would getting a knot out of your own hair.

Next was washing it, since it felt sort of odd to the touch. I just used my regular shampoo and squished it into the wig, brushing as I went and making a big foamy mess. Using my shampoo seems to work fine and I haven't yet had any problems with any of the wigs I've washed.

After shampooing, I just rinsed it out with cold water and brushed it again.

While I was working on it... I noticed this wig isn't actually very great quality when compared to the other wigs I have, which was a little bit upsetting.
Isn't Soom supposed to be 'Master of Everything'?
Oh well....

After I'd rinsed the wig, I got a bunch of my conditioner and worked it into the wig. First just by running my whole hand along it, then in smaller chunks. I used quite a bit of conditioner, but I wanted it to be thoroughly coated.

Then I went on to the fun part. I separated the wig into chunks of curl, just using how it naturally clumped. Some were big, some were small, didn't really matter, I just didn't want to fuss with the fibres too much. Just twist them around your finger then pull it out and twist the curl at tight as you can and let it go.
I worked on each curl individually, making my way around the wig top to bottom. It doesn't really matter which order you do it, but it's easier to work from big to little.

Whichever way you choose to work, take the first curl and hold it as close to the base as you can with your index and thumb (or thumb and finger of choice) of one hand. Then, with your other hand, start drawing your fingers down the curl until you get to the end. Then, start over. Keep working down the curl until it feels smooth and there are no stray fibres.

Don't let go of the base.

When you think the curl is smooth enough twist it tight, take a piece of paper towel and start wrapping it around the curl in the opposite direction of the curl. The paper towel should get wet enough to stick to itself just from the water in the wig, but if it doesn't, put some water on your finger and continue wrapping until wou reach the end of the curl. Then simply wrap the paper towel over itself and squeeze the whole curl to make sure it's sticking.

You can let go now.

---

Do this for each of the curls and then put the paper towel-coated wig on it's stand and leave it on a towel over night (unless you want a big puddle of water... then omit the towel).

You should be able to just slide the paper towel curlers off once they're dry, but if not, you might have to uncurl them. The curls will feel a little bit crispy, but that's okay.

Now, I didn't wash the conditioner out after the wig was dry, I just ran my fingers lightly through the curls and ended up with super soft ringlets.

Here's a sort of but not really helpful photo of after I did this.

Damaged Soom Glot wig
If you want to wash the conditioner out, wash the wig again under a slow stream of warm water and then redo the paper towel curlers and let it dry overnight.
After it's dried, you can do some styling and cut out any frizzy bits that are left (probably the very ends).

To cut/style wrap your doll's head in some saran wrap - make sure it's tight around the neck - and put the wig on over top. Then just cut away to your hearts content. Try to take off a little less than you think you want to so that you can correct any mistakes.

---

After all of this, I decided that I think I actually want the wig straight... but that will be another post (with pictures this time! I promise!) if I decide to go ahead with it, since this one is getting a bit unruly.

Saturday 5 November 2011

The Itty Bitty Doctor...


Many eons ago*...

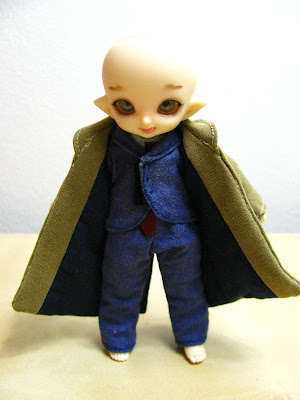
I messaged someone about a WTC thread they had put up for a pukipuki-sized Dr. Who cosplay outfit...

---

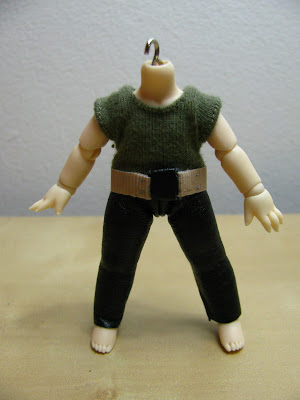
It's been a bit of a painful process since I'm more used to just making something and having it fit the first try and I've had no end of troubles with these tiny outfits....

But I've finished nearly everything, just little details here and there need fixing (closures, buttons, that kind of thing.) This is the third or so tie that I've made... I have a feeling I'll find the others in a month or two tucked away under the couch or fridge, just out of paws' reach....

pukipuki Cupid2 - Doctor Who: River Song costume
pukipuki Cupid2 - Doctor Who: Jenny costume


Interesting though it was, I'm glad to have it finished - and I'm now 100% sure I don't want a puki! I am so bad at posing and photographing them. ^^;

Now I can start on Christmas presents and my collection! :)


Lesson Learned: Sewing for tiny tinies is much harder than one might think.


*not really.